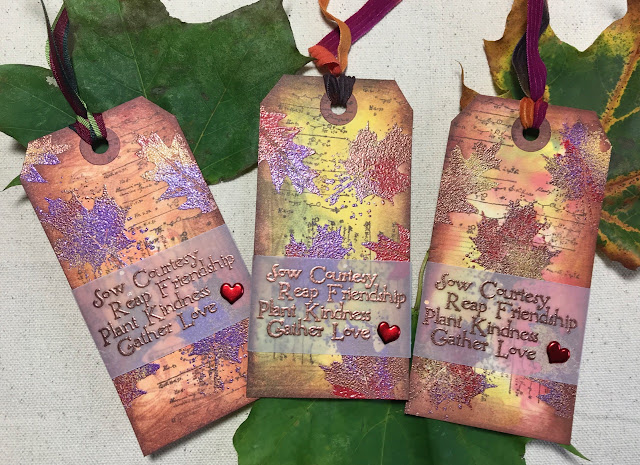
I wanted embossed leaves of different colors to mimic the beauty of the fall leaves where I live. I used Autumn Splendor (October 2004) stamps to random leaves with versamark ink. One of the stamps had some spots around it, which I thought would add a little "noise" and cover up any stray embossing powder that might stick to the tag. I put each color of embossing powder on a separate piece of paper.

I sprinkled each color on the tag, shaking off after each color. You want to sprinkle sort of randomly and lightly - you don't want to try and coat the whole tag with each color. I started with purple (Paul's idea!) in this tag.
Next I did yellow.
Then I did a red. I tried to make sure there was a little blank space left over on each, but as long as you lightly sprinkle, there will always be a few spots that are open.
Finally, I generously coated the tag with a copper embossing powder. I wanted to make sure the entire image was embossed.
This is the result after embossing. The leaves all look a little different on this tag, and on every tag. I really liked how this looks!
Next, I used ash ink from Club Scrap to stamp this stitched image from Wild, Wild, West (October 2005).
I then used distress inks (mustard seed, barn door, and peeled paint) to apply color to the entire tag. I used different ways of doing this on all of the tags. My favorite was to spray the tag lightly with water and swipe through the colors. At this point, I have to admit that I didn't love all of the tags. Some of the colors were quite dark, and the leaves disappeared a bit, but I kept on going! Ash ink is supposed to be waterproof, but I did see a little bleeding on some of the tags - there was a lot of water here! I liked this look.
After all of the tags had dried, I used this noise stamp from Science (September 2005) in Earth ink to create more texture. After stamping, I wiped any ink off of the embossed images.
After that, I used an ink applicator to ink the edges in earth. After doing this tag, I did switch to mahogany ink. I liked both, but the mahogany was a bit richer.
To finish the tags off, I stamped a sentiment from Autumn Splendor on vellum paper, and taped it on the back. I did put all of the tags in my book press overnight to flatten them out. I then added a heart brad, and some ribbon or fiber to complete the tags. I just love how no tag is identical. I've shown a few of them below.
I hope my swap partners love receiving these as much I enjoyed making them!


