Showing posts with label scrapbooking. Show all posts

Monday, March 05, 2012

Digital supply organization - Go green, go digital!


Do you find yourself not being able to find your supplies?  Do you forget what you own and then buy it a second time?  Don't worry - you're not alone, as I'm guilty of saying "yes" to both of those questions!

Over the next few weeks, I'm going to share some ideas I have for digital organization of your crafting supplies.  This could apply to nearly any craft, and can work whether you own a Mac, PC, or iPad - I'll give you tips for each platform, as I work on all three.

Before we get starting on going digital, I thought I would share what I'm doing now, and why I'm making the switch to digital organization.

Current stamp organization

My stamps are organized in binders, with an index sheet on the front, and a laminated index sheet behind it.  I scan, stamp, or download an image of the stamps to create the index sheets using photo editing software as needed.  Several images sheets can generally fit on one page, making stamp storage take up a little less space.
Binder with stamps (8.5 x 11); stamps can be pulled out of the page protector for easy use.
Each index sheet is then printed as a half-sheet of letter paper, and put into a three ring binder.
Smaller binder with index sheets for all of my stamps (5.5 x 8.5)

I started this organization process after I had been stamping a while, and I generated a list of some categories that work for my crafting. The binders are separated by these categories, either as a whole binder (for the stamps) or an index divider (for the index sheets)
  • All Occasion (doesn't fit into a category - graphic images, sentiments)
  • Borders & Backgrounds
  • Card Verses (ex: mostly text, or for a specific event like graduation or Father's Day)
  • Christmas & Winter
  • Great Outdoors (ex: trees, scenic stamps, skiing, sports)
  • Hobbies (ex: theater, crafting)
  • Nature (ex: flowers, birds, butterflies)
  • Nostalgic (ex: steam punk, vintage sewing)
To find a stamp, I flip through my index sheet binder (it's smaller and lighter than the stamp binders!), select a stamp, and then grab it from the binder.  I still have plenty of woodmounted stamps, too, so those are also in the index binder.  They are cross-referenced to their location so I can find those, too.

Why go digital?

Here are some compelling reasons I'm going digital:
  • The binder is getting big - and full.  I'd like to be able to "store" my images in a smaller footprint, and not use up more space to store sample images.
  • I can't find what I own.  My husband might tell me to sell some supplies, but we all know how realistic that is!  If I go digital, I can plan on searching with a digital database.
  • Club Scrap has gone digital.  Each month, I get a new Club Scrap kit. Each kit comes with great ideas for layouts, stamps, and more. They used to send out paper versions of all of these items (that fit in cute little binders), but are now sending me PDFs. I don't want to print out PDFs if I can avoid it, so this is a good time to switch.
  • Only my stamps are organized. How many times have you gone to a Stampin' Up! party or scrapbook store to wonder if you owned something that you were considering purchasing?  With a digital system, I could organize more than just stamps more easily.
  • It's greener. This isn't the most important reason for me, but it is another factor. Of course, as an engineer, I then start to wonder how much electricity I'm using with my digital system....

What's next?

So, in the next few weeks, I'll share with you:
  • How to get digital images of paper supplies (it's easier than you think!)
  • How to decide on a categorizing system
  • How to use digital tools (most of which are free!) to store and access your materials
Is there anything you'd like to see or have me add to the series?  Let me know!  I'm still writing, so there is plenty of time to shape the discussion and have your questions answered.


Tuesday, August 03, 2010

Tutorial: Mixed media embellishment

Of course, mixed media means "anything on my desk," right?

Today, I'll show you how I made the tag on this scrapbook layout:

I'm taking a class at Big Picture Scrapbooking with Claudine Hellmuth, and it's causing me to look at my supplies in a new way.  In particular, we're learning a lot of background techniques that can be used as building blocks to create more complex pieces.  I'm using chipboard, a dictionary, gel medium, and a brush to start with.

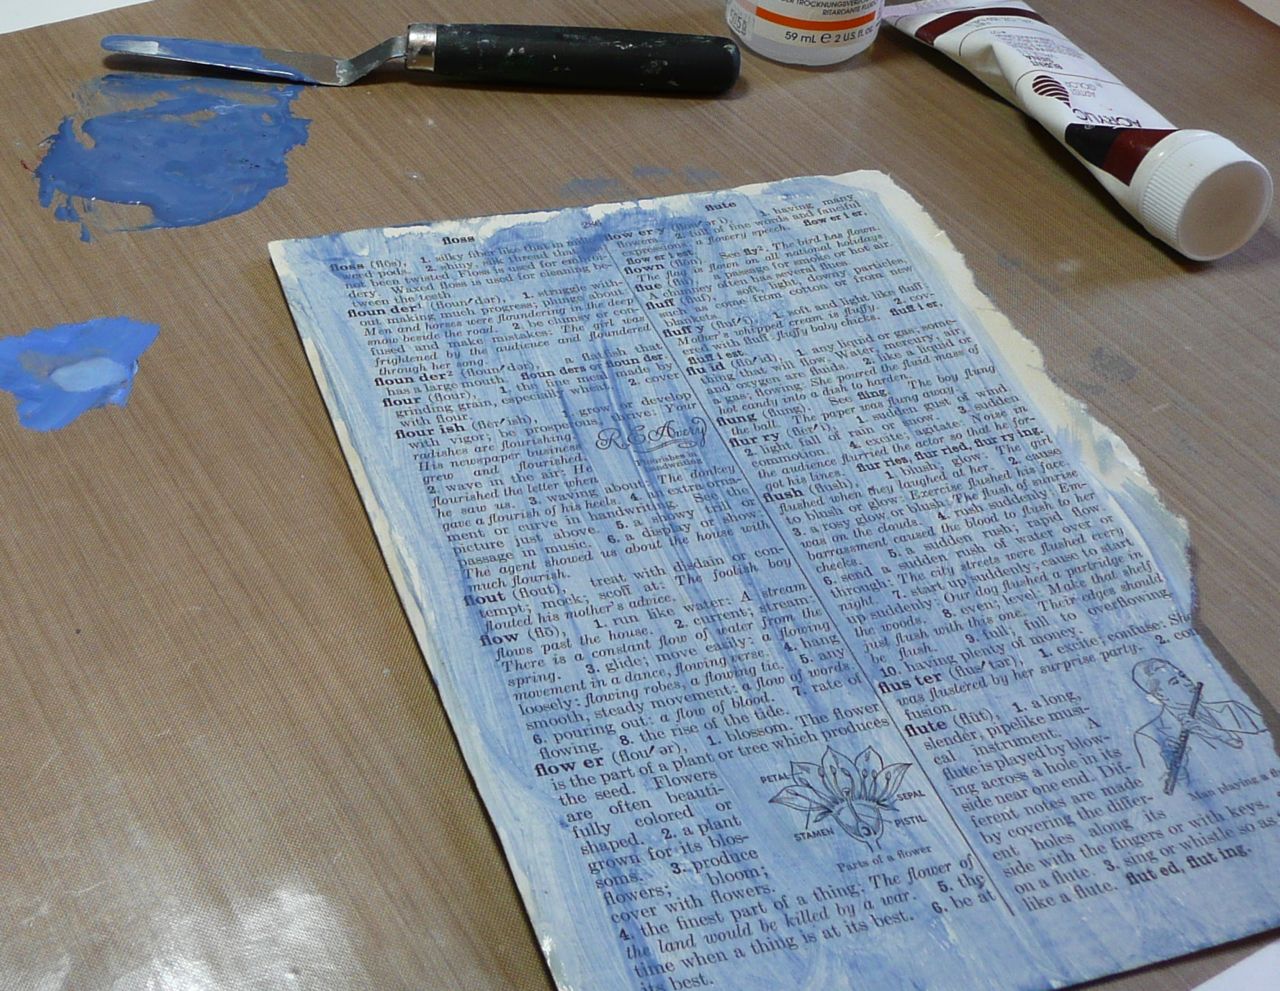
First, I glued a page from a dictionary to a piece of chipboard using fluid gel medium.  I like this dictionary because it has some nice pictures on some of the pages.  The page on the right is a piece of textured grungeboard.  I'm using the piece on the left today.

Next, I mixed paint to create a soft blue.  Blue is one of my favorite colors, so I knew I would be able to use this somewhere.


I then die cut the chipboard into a variety of pieces using my Sizzix Big Shot machine.  If you don't have a die cutting machine, thin chipboard is easy to cut into squares or rectangles that can be used as tags.  I glued an image transfer of some flowers onto the rolodex die cut.


To finish it off, I added a strip of vellum, a bit of ribbon, and some chipboard letters.  I really like how this turned out.

And, as a side note, I will be continuing to blog, but will take a more relaxed pace for the rest of the summer.  I will post a few times in August and early September, but not on any particular schedule.  I hope you enjoy the rest of the lazy days of summer!  (That are turning into not very lazy around here!) I plan on taking at least some time to read some crafty books and gather some new inspiration. Some of the books on my list include some books I love about collage and image transfers.

If you're interested in learning more collage techniques, I really recommend the books by Claudine Hellmuth.  She has a lot of great techniques in her books, as well as examples of projects and composition ideas.  Both books are packed with techniques.  In her first book, the style is more vintage/grunge and in the second, she shows us a lighter style to collage with brighter colors.


If you're just interested in learning about image transfer techniques, like how I made the flowers on my tag, I recommend the book "Image Transfer Workshop." It introduces 35 techniques, and each one is accompanied by a description of its limitations and uses with step-by-step pictures.


Sunday, June 28, 2009

Copper Country Cruising and Scrapping

I haven't scrapbooked since last year sometime. It's kind of crazy - I love to scrapbook, but I got more focussed on projects for the last year. I've found that I like scrapbooking ALSB style (Assembly Line Scrapbooking). Two Club Scrap members came up with the method - they would make pages out of their kits without picking pictures out. Club Scrap has instructions each month to make your entire kit into layouts for your current kits.

Club Scrap also has these great idea decks. You can find a layout you like, pick the papers, and follow the instructions to make a great layout. Sometimes, I can be more creative with these layouts by adding a whole bunch of embellishments, but sometimes I just want to get the layouts done. I like looking at the pictures later, and it's not as important to me that each layout be completely designed by me. The idea deck is great for using up older papers that might match, but you don't have the whole kit anymore. These layouts are both rotated from the sketch, which leads to a whole variety of layout options. I've actually used these patterns to create whole books, and by the time you add pictures, different embellishments, and journaling, nobody even recognizes the identical layouts from page to page.

These layouts are from my mom's visit last fall. We went Copper Country Cruising to look at the leaves, and took some great pictures. The paper on these layouts are mostly from a design classic remix of the collections paper printed on a variety of kits. The foil stickers with the gold leaves are from the Autumn Splendor kit.

LinkWithin

Related Posts Plugin for WordPress, Blogger...