Tuesday, October 26, 2010

Organization tip #1: Purge your stash


I've been scrapbooking in the "modern" way for 11 years.  I had a scrapbook when I was 10, but since my supplies consisted of crayons, newspaper clippings, and tape, I didn't accumulate many supplies at that point in my scrapping life.  I've found a lot of stuff over the years on sale, at craft shows, and local shops.  I also live in a rural area, so when I go shopping, I tend to overdo it a bit - who knows when I'll next see interesting things?

After 11 years of this, however, I simply have too much stuff.  I can't cram any more stuff into the space I have.

So, step 1 is to purge your stash.  This is but a sampling of what I purged.


I got rid of things that...
  • Didn't fit my style anymore.  Things I bought even 3 or 4 years ago aren't necessarily true to how I craft today.
  • Were duplicates.  I've actually bought things more than once because I forgot I had them.
  • Didn't inspire me anymore.  I had plenty of stuff that I could use, but if it didn't give me a thrill, I weeded it out.
  • I had too much of.  I have loads of patterned paper, particularly from "stacks" of paper.  They're a great bargain, right?  Well, they're not such a great bargain if you don't use them.  I sorted through these stacks and got rid of paper that I didn't love.
  • I haven't used.  I've changed tools over the years (from a fiskar's shapecutter to a big shot die cut machine), so I eliminated the tools that weren't doing the best job for me anymore.
As I did this, I kept reminding myself that the things I got rid of would make it easier to find the supplies I love.  I did this quickly - no point in prolonging this longer than necessary.  And, in some cases, I purged things so that I would fit into a certain space.  I have one drawer, for example, that I wanted to devote to patterned paper.  I needed to purge enough other paper to fit what remained in one drawer.


Here are a couple of ideas for how to recycle these items:
  • Donate them.  There are plenty of groups that would love these supplies, like a school, shelter, or kids organization.
  • Sell them.  My local scrapbook store has a rummage sale, or you could have your own.  I'm going to sell most of these items at my local scrapbook store - it brings in good business for them, and helps me with a little extra cash.  To make things easier, group some items together for pricing - nobody wants to price individual sticker sheets.
  • Give them to your kids.  Your leftovers are their treasure!  Unfortunately, I don't have any kids, but my friends swear by this option.  Of course, the supplies don't leave your house, but they are out of your hair!
  • Trade them with your friends.  There are several "pay-it-forward" groups on the internet, or your local friends might be up for a swap.  If some of my items don't sell at the scrapbook store, I will trade some of the items so I can get other things that I'm looking for.

I'm probably not done purging yet, but I've reached my limit for the moment.  I'll show you more pictures this week of how I've been organizing my supplies.  What's your favorite tip for sorting through your items?  How do you recycle items you no longer need?  I'd love to hear your ideas!

Sunday, October 24, 2010

Coming this week - organizational tips!

I've been out of the creating mode for a little while now.  I love creating, but I can't find anything anymore!

So, I have decided to make order out of the chaos, and have been doing a major reorganization project over the last few weeks.

This week, I'll share how I organize..

  • Stamps
  • Spellbinders dies
  • My work space
I'll also share some ideas for what to do with the things you don't have room for anymore.

I hope you enjoy the ideas and that it inspires you to do some "fall cleaning" in your space!

Sunday, October 17, 2010

Easy Labels for Home Canning


I love canning.

I never thought I would say that, but I just love to hear that "pop" and opening the cans later to find some deliciousness from the fall.  This year, we made a few cans of chutney.

Of course, I also love paper, and I was super excited to find that the Tim Holtz Lost and Found paper contains 2 x 2 inch squares of his paper.  These squares fit perfectly on a canning lid (after being cut into a circle).  The other benefit of this paper is that it has a micro-version of the print, so instead of a small piece of a big pattern, you get a really nice scaled version of the paper.


Some people think I'm strange to make pretty labels for the cans, but I think it makes it easier to give them as gifts later, and it feels more special to me.  Why shouldn't my cans look fabulous?

After a few years of hand-stamping labels, and storing them in my (slightly yucky) basement, this is the process I use to make my labels.

  1. Print the text on a sheet of desired paper.  For these labels, I chose a slightly translucent paper, since I wanted to see a bit of the pattern.  I use a table in my word processor, with the width and height of the cells equal to the size I'm going for.
  2. Cut out the labels with a circular punch, die, etc. of your choosing.  I used my spellbinders dies.
  3. Trim the patterned paper to 2 x 2.
  4. Glue the label to the patterned paper.  For a translucent label like this one, I just put a little glue behind the black writing.
  5. Run the 2 x 2 patterned paper through a xyron with a laminate/adhesive cartridge.  This makes the top protected with plastic (good for our basement), and the bottom with a strong adhesive.
  6. Cut out the label with a die, punch, etc. of your choice.  I used a spellbinders scalloped circle.
  7. Stick on your can and admire!


And what, you might ask, is Marrow Chutney?  Well, chutney is a sweet-and-sour type of relish that is popular in indian food, and in England.  Marrow is the British name for zucchini.  We got a huge zucchini from a friend, and Paul has been wanting to make marrow chutney for a while.  We use this on our sandwiches quite a bit to add a bit of zing.

Just love these new papers by Tim Holtz - I can see a lot of crafting possibilities with these.  And, the spellbinders dies are used constantly in my craft room. Basic shapes are the best - circles never go out of style, so you can't go wrong stocking up with these shapes.  And, the laminating/adhesive cartridge for my xyron is something I make sure is always in stock for canning season.


Sunday, October 03, 2010

A new card for a new month

Where did September go?  My day job is at a local university, and I get very busy at the end and start of every academic semester - particularly in the fall.  I haven't had much time for crafting, but I've been quite busy the past week crafting, so I have some great things to share with you in the upcoming month.

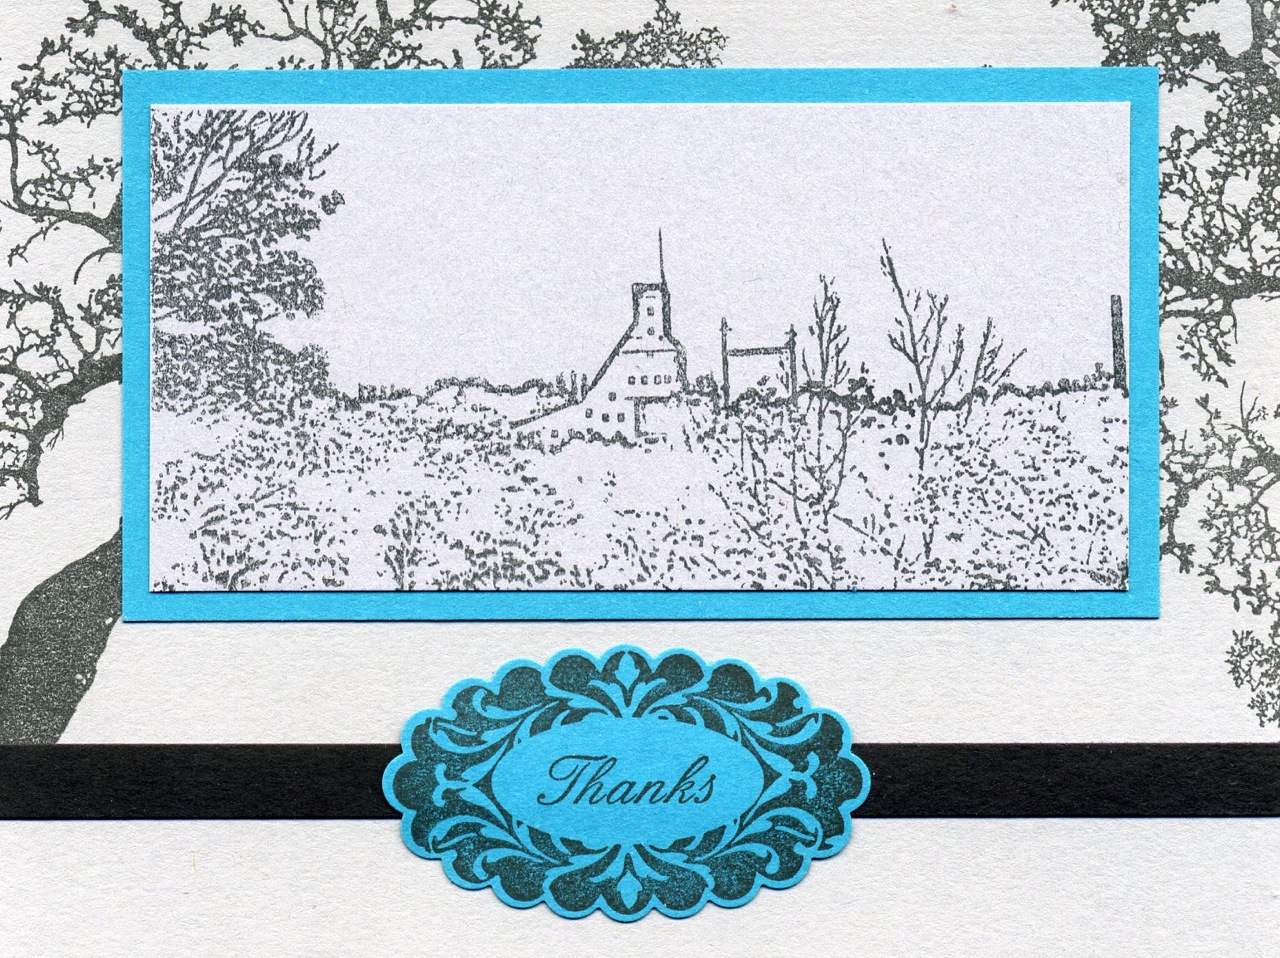
This time, I wanted to share a simple card I did for work.  I make thank you notes for an event I run every year, and have to keep these simple since I need to make at least 50 of them every fall.  This is the card I came up for this year:


I wanted to create a lot of depth and character without a lot of layers or embellishments - everything is paper in this card!  The background layer is stamped with one of my favorite go-to stamps - the Oak Branch from Stampscapes.  These stamps are usually used to create scenes, but they can be used for so much more than just scenes.

The foreground image is of the Quincy Mine - a local landmark. Stamper's Paradise makes several sheets of stamps relating to our local area.  I can see Quincy Mine from pretty much everywhere on campus or in town.  You can see it here from a quick shot I took last summer - it's the grey building just to the left of the bridge on the top of the hill.  Paul is standing on some of the new materials used in the construction downtown last year.


Finally, the thanks stamp is from the Perfect Punches stamp set from Stampin' Up!.  I really love their new cling mount stamps - I have been stamping with unmounted stamps for years, and really appreciate the savings in storage space and the less expensive price.  This particular stamp coordinates with the scallop oval punch.

The black strip is just a piece of cardstock.  I love using scraps of paper in place of ribbon.  So, with a little black ink and just a few layers, I think you can make a really cute card.  Here's another card I made using just lots of stamping, but not too many layers to make a cards for a large group.

All of the paper from this project was from Stampin' Up!

Tuesday, August 03, 2010

Tutorial: Mixed media embellishment

Of course, mixed media means "anything on my desk," right?

Today, I'll show you how I made the tag on this scrapbook layout:

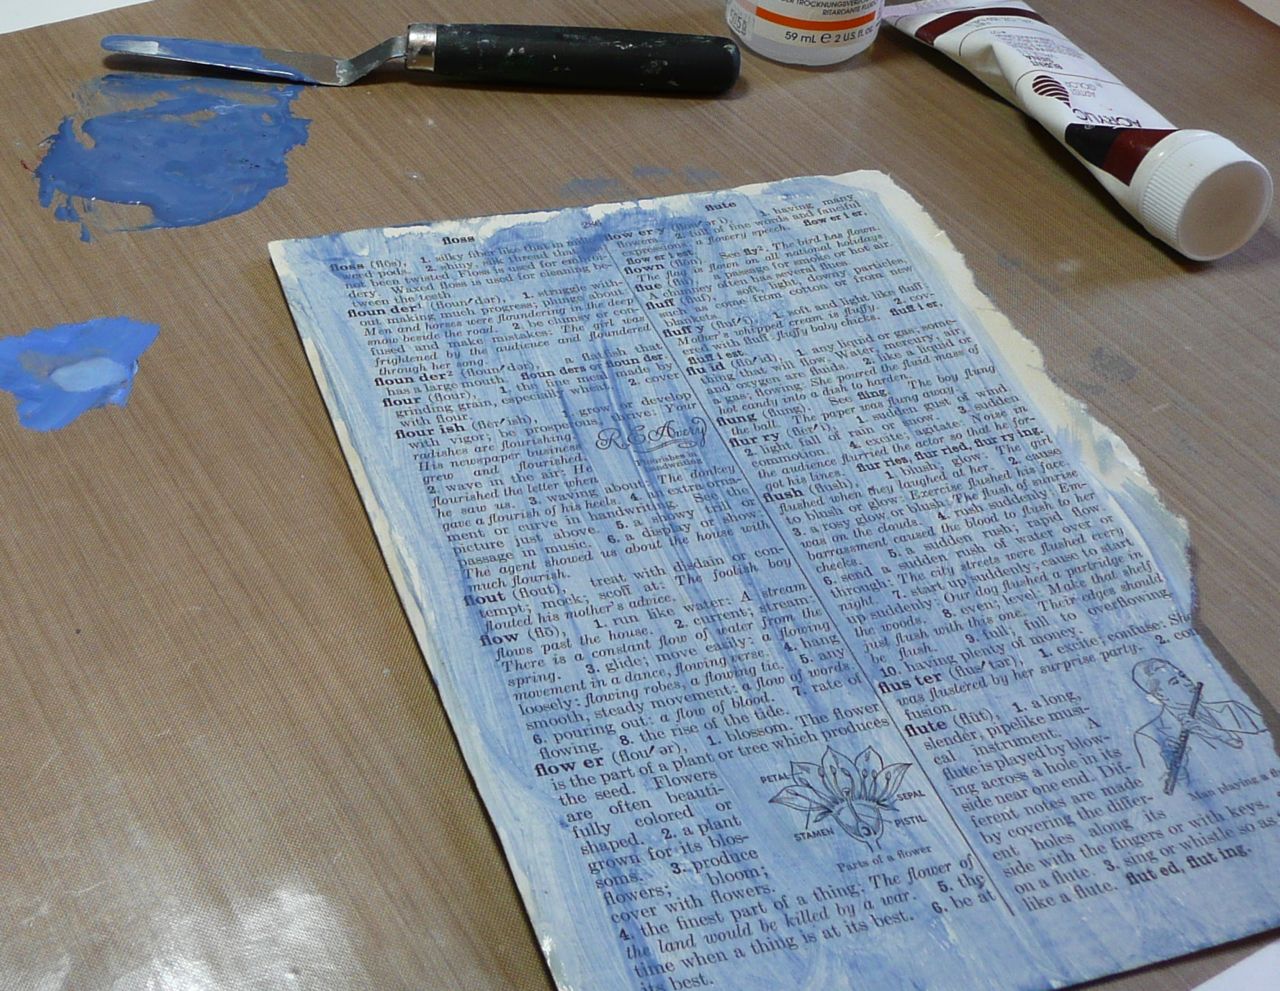
I'm taking a class at Big Picture Scrapbooking with Claudine Hellmuth, and it's causing me to look at my supplies in a new way.  In particular, we're learning a lot of background techniques that can be used as building blocks to create more complex pieces.  I'm using chipboard, a dictionary, gel medium, and a brush to start with.

First, I glued a page from a dictionary to a piece of chipboard using fluid gel medium.  I like this dictionary because it has some nice pictures on some of the pages.  The page on the right is a piece of textured grungeboard.  I'm using the piece on the left today.

Next, I mixed paint to create a soft blue.  Blue is one of my favorite colors, so I knew I would be able to use this somewhere.


I then die cut the chipboard into a variety of pieces using my Sizzix Big Shot machine.  If you don't have a die cutting machine, thin chipboard is easy to cut into squares or rectangles that can be used as tags.  I glued an image transfer of some flowers onto the rolodex die cut.


To finish it off, I added a strip of vellum, a bit of ribbon, and some chipboard letters.  I really like how this turned out.

And, as a side note, I will be continuing to blog, but will take a more relaxed pace for the rest of the summer.  I will post a few times in August and early September, but not on any particular schedule.  I hope you enjoy the rest of the lazy days of summer!  (That are turning into not very lazy around here!) I plan on taking at least some time to read some crafty books and gather some new inspiration. Some of the books on my list include some books I love about collage and image transfers.

If you're interested in learning more collage techniques, I really recommend the books by Claudine Hellmuth.  She has a lot of great techniques in her books, as well as examples of projects and composition ideas.  Both books are packed with techniques.  In her first book, the style is more vintage/grunge and in the second, she shows us a lighter style to collage with brighter colors.


If you're just interested in learning about image transfer techniques, like how I made the flowers on my tag, I recommend the book "Image Transfer Workshop." It introduces 35 techniques, and each one is accompanied by a description of its limitations and uses with step-by-step pictures.


LinkWithin

Related Posts Plugin for WordPress, Blogger...