Sunday, December 25, 2011

Merry Christmas with Love

If you've been following my blog for a while, you know that Paul and I exchange home made cards for most special occasions.  This Christmas was no exception.  Paul made me a lovely quilled card - I think this is the first large snowflake he has made.


He called this a simplistic design, but I think it's pretty special and intricate.  The green panel has die cut openings and is popped up to create depth.

I went with a bit of a non-traditional color scheme and design - pink and green (from the Retro kit by Club Scrap). Paul loves hearts, so I stamped lots of them on pink paper with white ink and trimmed them out.  These are all from various Stampin' Up! sets, and some coordinated with punches (I love those!).  My message inside reflects more Christmas than the outside - he commented that this could be a Valentine's card!


It's always fun to see what Paul has created for me, and these cards are really special to us. Hope you enjoyed a special day with those you love.  We're looking forward to a week off from the usual routine and celebrating the beginning of a happy new year!

In case you missed them, here are some other cards we've exchanged...


I'll be back on January 2nd to show you how I'm now organizing my craft desk!

Monday, December 19, 2011

Merry Christmas - Christmas Joys Altered Book

This is my first, and so far only, finished altered book.  I'm not sure why - I really enjoyed it and love the finished product!  I made this about seven years and filled it with some of my favorite parts of Christmas.

This started out as a board book.  I peeled off the paper from the pages, and primed them all with gesso.

I was into a lot of aging back then, so I think a lot of the papers are walnut stained and of course there is tearing!  These little girls are still two of my favorite stamps.

No winter would be complete without some snowmen!

And, of course, the reason for the Christmas season is a holy one.  I've sung Silent Night many times with choirs and in church.  I was happy to find this music to include in my book.

I  made this book seven years ago, so I can't remember many of the techniques involved in making it, but I remember the feelings I had and cherish the time I had to put these memories in a book form.  I hope no matter what holidays you celebrate that you take some time to record your memories and cherish those you love.

Check back next week to see my holiday card to my darling husband.  I can't show it to you before he receives it!  We make a habit of making each other cards for holidays, and it sometimes gets a bit competitive!

Monday, December 12, 2011

Paper pieced cards inspired by a card

Debbie Olson recently had a card on her blog (Merry Kiss-mas) that inspired me to make these cards.

One thing I liked about her cards was her use of patterned paper and stitching.  I don't do a lot of stitching on my cards, so I used a black pen to draw stitches.

I also liked how she had a small focal point, and it wasn't overly elaborate.  I had fun searching through my stamps and found these adorable images that I haven't used in a long time.  Instead of coloring the image, I stamped on patterned paper, and then paper pieced some of the bits, like the star and button.

I wanted to add a greeting to the front, so I stamped tiny greeting, rounded the edge, and used my tiny attacher to give a little oomph to the right edge.

I'm starting to use tools like EverNote and Pinterest to collect ideas and then scan through them for inspiration.  It was a lot of fun to use Debbie's card as a starting point, and see how I could use my supplies to make it my own.  How have others inspired you?  How do you organize all of those pieces of inspiration?  Patterned paper and stamps are from Stampin' Up!; other cardstock from various Club Scrap kits.

Monday, December 05, 2011

Make a Ruffled Ribbon Border for a Card

When I made my set of cards for Club Scrap using the Tilescapes kit, I decided to play with ribbon and made this ruffled border on this card. (Check out the rest of the Tilescapes cards in the Club Scrap Scrap Rap)

I wanted to see how this might work for a holiday card (surprise, it does!): 

I had a few folks ask me how I did the border, and it couldn't be easier.  It's easiest to show, however, with a video.  My video shows how to do the ruffled border and how to make those adorable holly leaves.


Here is the final card that I was working on in the video. The background is subtle, but more pronounced in real life:

I'd love to see what you make using this technique!  If you don't already have a tiny attacher, check it out at Amazon, or my previous blog post where I review it and show another sample card.  If you like the background stamp, check out the 2011 WOW Holiday set. The greeting stamp is from the Angels on High collection.

Thursday, December 01, 2011

Tutorial: A snowy paper-pieced scene

While on vacation for Thanksgiving, I was watching some podcasts, and got inspired to make a card featuring a paper-pieced Christmas scene. If you haven't seen it already, check out Christine's Scraptime podcast that shows her paper piecing snowmen, or Amy's blog and video featuring a snowy scene.

I started by stamping my snowman (Happy Snowman from Hero Arts, no longer available) on white paper and patterned paper.  Trim around the outer edge of the white snowman, and the pieces that want to be patterned paper - in my case, the scarf and hat.

I used my Fiskar's Rotary Cutter to trim pieces that look like a rolling hill from a piece of blue patterned paper (a 6x6 pack from Stampin' Up!). 


Monday, November 28, 2011

How to make a stamped grid background

I was so excited to be asked by Club Scrap (my favorite paper company in the universe!) to create some cards for their new kit - Tilescapes.  All of my cards are featured in the Tilescapes Scrap Rap - check it out - it's a free magazine with great ideas for papercrafting.

The Tilescapes theme and stamps lent themselves really well to creating wonderfully intricate background like this card:

I started by putting my stamps on a gridded acrylic ruler - this is the 2x8 one by Club Scrap.  I like their rulers because they are made for papercrafters with 1/8" separation, but gridded rulers can also be found as quilting supplies. The lines will help keep things straight as I go.


Monday, November 21, 2011

Giving Thanks - a little reminder

I'm spending this week with my family, and extremely thankful that I have the opportunity to do so. I hope my all of my readers spend some time with those they love this week.

So, an appropriate card for the season to share the thought with you...


If you missed the earlier post that featured the techniques used in this card, check it out.  Back next week with some brand new cards featuring some brand new stamps!

Monday, November 14, 2011

Hand stitched book with snowflake spacers

Sometimes, I like to put too many layers in a book, like matted photos and embellishments.  Putting spacers in the spine helps let you put more embellishments in a book while still allowing it to close. This book features a hand-stamped cover with snowflakes:


I folded white pieces of paper in half before using a snowflake border die (Snow Flurries) to cut the open edge.  Every other signature in the book had a snowflake folded around it.  Here is what the spacer looks like in the book:

Monday, November 07, 2011

Dazzling Holiday Cards

In Europe, stickers known as "peel-offs" are extremely popular.  They're made in the Netherlands, I think, and craft stores will have scores of them.  They are all glittery, and come in a variety of styles.  The sticker part is the outline of the image, and they look like embossed images when placed on paper.  One of the easiest things to do with them is to put them on a piece of cardstock and color in the image.  Here, I used smooch ink to make a shimmery colored image.

One of the best distributors of these stickers in the US is the company Paper Wishes/Hot off the Press.  They also have a monthly club that sends you a set of 4 stickers (they call them "Dazzles") every month along with a selection of coordinating paper and embellishments.  Here is an example of a stacked dazzle card:


Monday, October 31, 2011

Tutorial: Masking to make holiday cards

I love to use masking to create depth and dimension to my cards without adding a lot of bulk. Sometimes, you want a card with fewer layers to allow you to mail it more easily.

In my video, I show how I made the panels for three different cards.


Here is the finished card using technique number one:


Thursday, October 27, 2011

Crafting for fall - cards with distress inks

I'm still in the mood to play with distress inks, and I had several friends I wanted to send cards to. These are the results! If you missed me playing with distress inks, be sure to check out my earlier post.  Most of the paper is from the Scholarship and Adobe kits from Club Scrap - some great blues and tans in there.

Stamps and punch from Stampin' Up!

On these next two, I had a lot of fun using my Tim Holtz Tiny Attacher.  Check out my earlier review if you want more information on this cool stapler.
Punch and friend stamp - Stampin Up!; Leaves from Club Scrap.

Monday, October 24, 2011

Cards for a Cause

October is Breast Cancer Awareness month, and this year I participated in a card-making event during the Club Scrap retreat to create lots of cards to give to a local charity.

When we first opened the stamps, Paul thought "Bald is beautiful" was a stamp made for him.  I'll have to figure out how to repurpose that into a card for him someday!


Thursday, October 20, 2011

Swapped Puzzle Pieces

As much fun as it is to make altered art, it's even more fun to receive it!  Here is a quick post featuring the lovely art work from the artists at our Club Scrap retreat.  If one of these is yours, please leave a comment so others can get in touch with you to find out more!
A few of mine at the end.

By Judy Y.

Monday, October 17, 2011

Altered Jigsaw Puzzle Pieces

One of the fun things to do at a Club Scrap retreat is participate in a swap. This year, we swapped altered puzzle pieces. Some google searching did not yield many ideas, so I struggled a bit with this. I really like to add paper to altered objects, but couldn't imagine cutting around all of the pieces. I finally decided to work with inks and embossing. To start, find a puzzle with fairly large pieces - I thought this child's puzzle would be great (I found mine at Goodwill).

Next, I sanded the pieces a bit to rub off some of the paper, and provide some "tooth" for the next step.

I then painted each piece with two coats of gesso. I like to start with a white surface when I alter items. I do the same thing when I alter board books.  I used a mini-file to round off any bumps and to lightly sand the worst of my brush strokes off of the surface.

Each piece then got a coat of ink. Pigment ink worked great for this, as did brilliance ink. I'm showing one of my pigment ink samples here. I let these dry overnight. You could use a heat gun, but it takes a while with 20+ pieces.

To add a bit of texture (and fit with the Club Scrap retreat), I used a stencil from a kit and a mist to spray. Interestingly, I got super sharp transfer when I tried this out the day before, but some of these bled and really faded a lot. I'm wondering if my pigment ink was "wetter" when I did it the day before.

Since some of them were too light or monotone for me, I used some different inks with the stencil to apply another dimension to the background.

Finally, I embossed a background stamp on the puzzle piece with Stampin' Up! silver embossing powder. By far, they make the best embossing powders in my opinion. I also did a quick coat with acrylic sealer to give the overall surface a little shine (this is before the coat).
Some tips for altered projects:
  • Make a lot.  I always start with more than I need so I can experiment and try some things out.  This puzzle also had some damaged pieces, so those made great test pieces.
  • Test your techniques.  I used a piece of chipboard and gesso coated it to see what inks would dry on the surface.  It turned out that all of them did (eventually) so that made the options pretty open.
  • Set aside lots of time.  I messed up with this one this time around!  The pigment ink dried nicely overnight, and the mist would have dried nicely overnight if I had the time.  Your heat gun can speed things up, but at a few minutes for each piece, this was a lot of time I could have used for other activities.
  • Dye ink and gloss medium do not mix. Some of my stenciling was with dye ink, and I tried to put some glossy medium on top.  I loved the way this look, but it caused all of my dye ink to bleed.  (This is why I make a lot!)
  • Be flexible.  My misting worked one day, but not the next.  My pigment ink pad went a little dry.  I improvised by using other ink pads, and adding some stenciling.  It's altered, so it's all good.  It makes each piece unique!
  • Have fun!  I stressed when I couldn't find a lot of examples to guide me, but it is fun to experiment and try something a bit different.
I'll post the items I swapped for later and a few more pictures of my favorite pieces I made.  By the time you read this, I will have done the swap, and can't wait to be inspired by their creativity!

Monday, October 10, 2011

Holiday cards with masked monochromatic panels

Once I get started on a technique, I really like seeing where it can take me.  I had this cool grey paper that I've been hoarding for a while, and thought about using the color blue with some holiday stamps  from the Silent Night collection at Club Scrap.  The stamps have a cool stencil-type look, so I played with these to see what I could make.  The rest of the paper is from the Raku collection at Club Scrap.  Here are some of the cards I came up with:


The Christmas tree stamp is a collage image from Club Scrap that is no longer available.   I really like how these are holiday cards, but they use a fairly non-traditional color scheme.  The Raku kit isn't even for holiday cards - what color combinations have you used for holiday cards that are non-traditional?

If you've been wondering how to set up your tape to do the masking, or want to see how these monochromatic panels are different from the ones I've previously shown, check out my latest tutorial video.


Tuesday, October 04, 2011

100th post!

Wow. When I started blogging, I really had no idea what I was getting into. I am so blessed to have met some wonderful people while blogging, and am incredibly grateful to everyone for their support and encouragement.

Since it's taken me a while to get to 100 posts, you might have missed a few along the way!  Here is a rundown of the all-time top 10 posts on my blog as of today.  Enjoy!

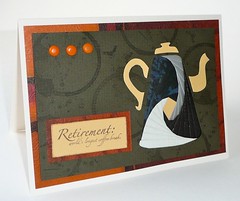
10 Iris folded coffee pot Iris Folding - four cards
I was inspired to try some iris folding after doing a card for a Club Scrap class, and share four of my cards in this post.
9
Organization tip #4: Spellbinders storage plus tutorial
In 2010, I went through a major reorganization of my crafty space. See my tips for organizing spellbinders dies complete with a tutorial.
8
Organization tip #3: Rubber stamp storage
I also shared some organization tips that I use for my rubber stamps!
7 Wedding card with mini-origami dress Wedding cards with origami dresses
Thanks to the All Things Paper blog, I found this great origami book, and played with making wedding cards with white folded dresses.
6
Making Memories Guest Designer
I made this great little travel book using a line of paper from Memory Makers. See a bit of my trip to England in summer 2009.  Of course it took a year to make the book...
5
Tutorial: Make a book with shaped pages
I love using Spellbinders dies, and here I take one of the shapes to make a mini-shaped book
4 Post bound book and card How to make a post bound album
Making a post bound album is surprisingly easy, and they make great gifts.
3
How to make artistic panels
In this post, I debut my youtube channel!  I love making tutorials, but they're sometimes easier when you're taping rather than taking static pictures.  Later, I use these panels to make a fabulous flag book.
2
Pine board book - Caardvarks challenge
I don't participate in many challenges, but this one was something that caught my eye.  You'll actually see some similarities to post #3 - I used some of the same masking techniques here on a bigger scale.
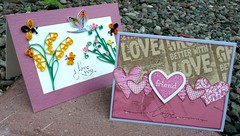
1 Anniversary Cards Greeting cards with love - and a giveaway!
This is surprising to me - I know there was a giveaway, but it's long over (2010), and it still ranks in the top ten viewed posts of the last month.  I think love is always a popular topic, and making a card for someone you love is always a great way to spend your time crafting. Can you guess which card my husband made?

Thanks for reading my blog!  Please let me know what you'd like to see in the next 100 posts!

Have a great day!

LinkWithin

Related Posts Plugin for WordPress, Blogger...