Showing posts with label tools. Show all posts

Sunday, September 18, 2011

Tools of the Trade - Bone Folders

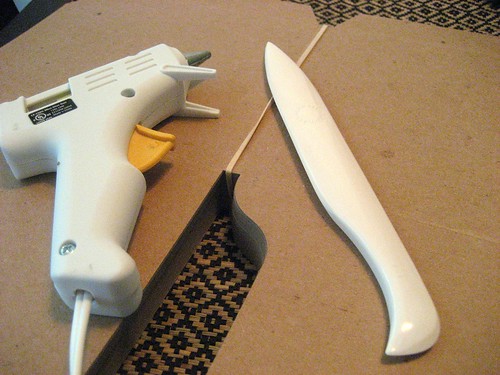
Every so often, I like to share some details about the tools I use in my papercrafting projects.  Today's topic is the bone folder.  You've seen me use this when I wrap book board - scoring the paper before folding over the edges gives a nice crisp corner.  Scoring the paper helps break down the paper fibers just enough so that the fold is easier and cleaner.


I also use this to tuck the corners to make nice, neat, corners when I wrap my book board.

After you fold the paper, the bone folder is really useful for burnishing the paper onto the book board.  The extra pressure from the bone folder helps the glue to make a great bond with the board. It's also useful for reinforcing the crease on a card.  It makes a big difference in making your project look crisp and finished.

I like to have several different sizes and shapes of bone folders.  They're handing for getting paper into small corners if you're making a box, and the different shapes can help with different projects.  This is a cool shaped one I found online:
Some invitation tools

A common misunderstanding about bone folders is that they're not all made from bone.  If you're not into using animal products in your crafting, there are many plastic varieties available.  In fact, one of my favorite bone folders is made from teflon.  A teflon folder is great when you're using specialty papers, because it doesn't tend to "stick" to the paper as much or leave a mark behind.  I've also seen bone folders made from wood - search etsy.com.

While listening to some bookbinding podcasts (I like Book Artists and Poets in particular), I found a great podcast (iTunes link) about Jim Croft who makes bone folders from elk and deer and teaches how to do this as well. I found this great picture of a student's work in class online:
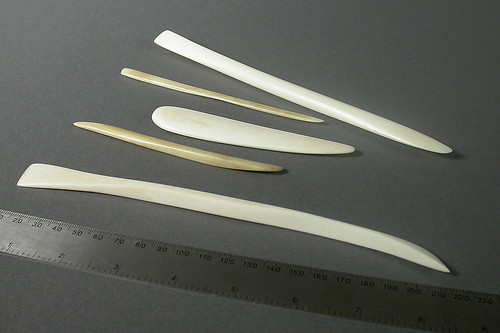
Bonefolders 1

So, bone folders are handy for folding paper, burnishing creased or glued paper, and for tucking corners in on books or boxes.  They come in a variety of shapes, sizes, and materials, so you can never have too many of them. You can even make your own!  What do you love about bone folders?  Do you have any other tips?  Share them in the comments!

Tuesday, January 11, 2011

Tool Time: Tim Holtz Tiny Attacher


OK, I have a confession to make.  I love office supplies.  If scrapbooking supplies even look like office supplies, I have to have them.

It's even better if they're a gadget or super geeky.  That's just the kind of crafter I am.

So, when I saw the Tim Holtz Tiny Attacher, I lusted for one.

I kept thinking, "Do I really need this?" (After all, I have been through a major purge in my scraproom!)

I also thought, "Is this really different than my other staplers?"

My biggest fear was that I was succumbing to my love for all things Tim Holtz, and that it wouldn't really be any better or different than my other staplers.  I was wrong - I really need this, and it's different than my other staplers.  So, here's a look at another tool I can't live without.

Why I love this tool:

  1. It has Tim Holtz' name on it (not the most important reason, but I gotta be honest!)
  2. It is so comfortable to hold, which makes it super easy to place the staple where you want them.
  3. It works - it really works!  I've had several mini-staplers, but this one actually staples properly on the first try.
  4. The staples are just so tiny and cute!  One-quarter inch, to be exact.
So far, I've used it on this cool card below.  You can see the ribbon has staples on either end - this is how the ribbon is attached.  To complete the "trio" of staples, you can also find some in the upper right of the card panel.  The ribbon is grosgrain, and the cardstock is a super heavy weight (Club Scrap), but this little stapler went through these thick materials with no problems.  Stamps are from Club Scrap and Stampin' Up

I'm excited to get out some alcohol inks to color these staples, and I'm really hoping that they release some colored options in the future (copper would be fabulous!).  So, if you lust after office supplies, but think this is just another stapler, think again and go pick one up.  It's even included as an Amazon prime item, which is my favorite way to shop. (It would be yours, too, if the largest store in town was Walmart!)
  

Wednesday, December 01, 2010

Perfect bows for your cards

This is one of the holiday cards I made recently.

Notice the perfect bow?  You might think I'm a genius, but in reality, I'm a bit bow-challenged.  During my recent organization, I rediscovered some of my tools, and I'm going to share some of the tools I use every day and some that I found again in some of my posts.

This tool is called the Bow Easy.  Mine was even made in the USA!  You can use this tool to make bows with loops measuring from 3/8" to 1 3/8" - in roughly 1/8" increments.  Since somebody else has already shared a video using this tool, check out how to use it:


A quick google search for "Bow Easy" or "Bow Easy template" will yield lots of results how you can make your own or purchase one.  At $5 a piece, this would make a great stocking stuffer for your scrapbooking friends. 

I'll post more on how I made the background of the card later and show you some more samples.

LinkWithin

Related Posts Plugin for WordPress, Blogger...