Sunday, September 25, 2011

Masking and distress ink to create artistic card panels

Near the lift bridge, fall is pretty inspiring.


I'm getting ready for fall, and have thanksgiving in my brain.  If you hadn't figured it out by now, I'm really into using masking tape to make card panels. I wondered what would happen if I made larger panels that would be the whole card, and if I could replicate some of the colors I see in the fall.

Here are a few examples of my finished cards.  This first card uses metallic inks from Club Scrap, along with some dimensional paint and ribbon.


This card was brayered using a multi-color ink pad. I embossed on top using a copper embossing powder.

Finally, I did more playing with distress inks and water.  I was going for a brighter look, and I really like how these turned out.

The card just above and the rest below matched what I had envisioned the best.  If you'd like to see how they're made, check out my latest video:


I hope you enjoyed a peek at these cards and the beauty of fall in your area of the world.  If you're lucky enough to live by a lift bridge, you can get inspired by the majestic colors around you.


Sunday, September 18, 2011

Tools of the Trade - Bone Folders

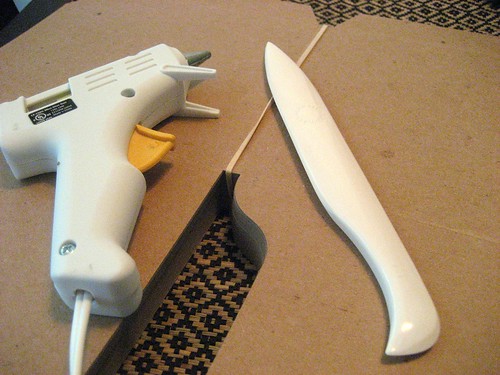
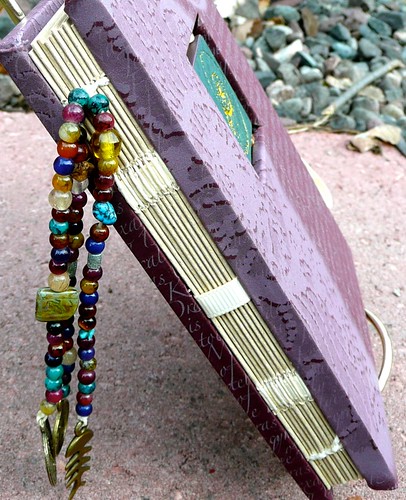
Every so often, I like to share some details about the tools I use in my papercrafting projects.  Today's topic is the bone folder.  You've seen me use this when I wrap book board - scoring the paper before folding over the edges gives a nice crisp corner.  Scoring the paper helps break down the paper fibers just enough so that the fold is easier and cleaner.


I also use this to tuck the corners to make nice, neat, corners when I wrap my book board.

After you fold the paper, the bone folder is really useful for burnishing the paper onto the book board.  The extra pressure from the bone folder helps the glue to make a great bond with the board. It's also useful for reinforcing the crease on a card.  It makes a big difference in making your project look crisp and finished.

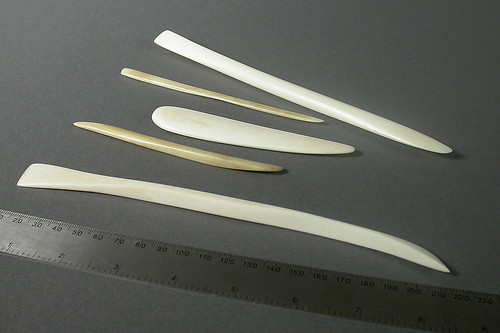
I like to have several different sizes and shapes of bone folders.  They're handing for getting paper into small corners if you're making a box, and the different shapes can help with different projects.  This is a cool shaped one I found online:

Some invitation tools

A common misunderstanding about bone folders is that they're not all made from bone.  If you're not into using animal products in your crafting, there are many plastic varieties available.  In fact, one of my favorite bone folders is made from teflon.  A teflon folder is great when you're using specialty papers, because it doesn't tend to "stick" to the paper as much or leave a mark behind.  I've also seen bone folders made from wood - search etsy.com.

While listening to some bookbinding podcasts (I like Book Artists and Poets in particular), I found a great podcast (
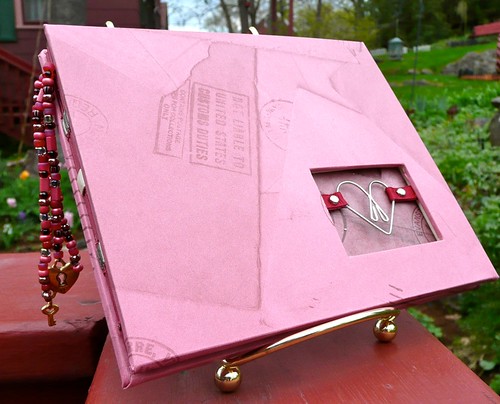
iTunes link) about Jim Croft who makes bone folders from elk and deer and teaches how to do this as well. I found this great picture of a student's work in class online:

Bonefolders 1

So, bone folders are handy for folding paper, burnishing creased or glued paper, and for tucking corners in on books or boxes.  They come in a variety of shapes, sizes, and materials, so you can never have too many of them. You can even make your own!  What do you love about bone folders?  Do you have any other tips?  Share them in the comments!

Monday, September 12, 2011

A virtual art show - Great Lakes Showcase 2011

This past spring, I was honored to have four of my art books selected to be included in 2011 Great Lakes Showcase.  The majority of materials and stamped images used in these books are from Club Scrap.  For those of you who aren't lucky enough to live near my lift bridge, here's a peek at what I showed.


First, a book with a heart in the window.


Heart paperclip in window

Inside of book with pocket

Next, a shaped book.  I did a tutorial on how I made this book.

Then, a book with some seaweed in the cover.

Finally, a book with a shell in the cover.
Window book with shell


I really enjoy putting beads on my spine.  One of the threads is left over from sewing the binding.  The other pair of threads are created by tying a long piece of linen thread around the kettle stitch at the top.


Binding of window book


The books with floating items in the cover were quite involved, and I have four posts showing you how to make this type of book:
  1. Decorating the style stone
  2. Creating the covers
  3. Adding the floating element to the cover
  4. Assembling the book
The last book, I am happy to report, earned a third place showing at the Great Lakes Art Showcase. Even better, the publicity I received led to connecting up with the The Studio Gallery at Presque Isle, and my books are now available in their gallery.  If you're visiting Marquette, this is a lovely gallery with some gorgeous work by nine different artists.  Check them out!


Thursday, September 08, 2011

An artistic flag book

As you might guess by now, I'm on a bit of a flag book thing lately (see my earlier tutorial and finished book). The panels I made earlier this week were actually for this book, and the leftover ones just made such beautiful cards, I had to share them right away.

This is the cover of the book:
Flag book showing cover

The squares on the cover were cut up from one of the pieces that didn't quite work as a whole piece. When you open the book, this is the view:

Flip the pages one by one....

I am just in love with the inside and outside of the cover. They show how versatile masking can be - it doesn't just apply to squares. You can also spread the book out:
...or view them spread out.

These books really shine when they're in motion. They are highly interactive, and make the coolest noise! I took a little video to share the book in motion with you:


I love the simplicity of these books, and how just a simple square picture or piece of art transforms it so easily. I plan on making more of these - if you have a theme in mind that you would like to see, let me know!

Monday, September 05, 2011

How to make artistic panels


The panels on these cards will always be unique.  Check out my video to see how I made them.


Some other tips:
  • The purple tape is a duck brand tape called "30 day perfect release."  The tack on it is a little less than the normal blue painter's tape or making tape, making it perfect for paper projects.  I found this at my local big-box store in the painting area.
  • If you need to use regular or blue masking tape, stick it on your clothes a few times to lessen the tack.
  • I tried using watercolors for this project instead of inks.  The watercolors were so fluid that they seeped under the tape.  This didn't create the crisp edges I was looking for, but I do have some great color panels to use on other projects!
  • I used a clear grid ruler from Club Scrap to line up my tape - since my ruler was three inches wide, and 14 inches long, it made it easy to line up the tape quickly. The tape is separated by 3 inches, which can create a 4 inch square when cropped.
  • Make multiple sheets at once!  I actually was playing with about four sheets at once.  You'll see more of the sheets later in the week, and that's why the panels on the card don't match the panels in the video.  This gives you a few extra to play with or not use if something doesn't work the way you'd like.
Stamps, stencils, paper, and embellishments are all from Club Scrap.

LinkWithin

Related Posts Plugin for WordPress, Blogger...