
The Tilescapes theme and stamps lent themselves really well to creating wonderfully intricate background like this card:

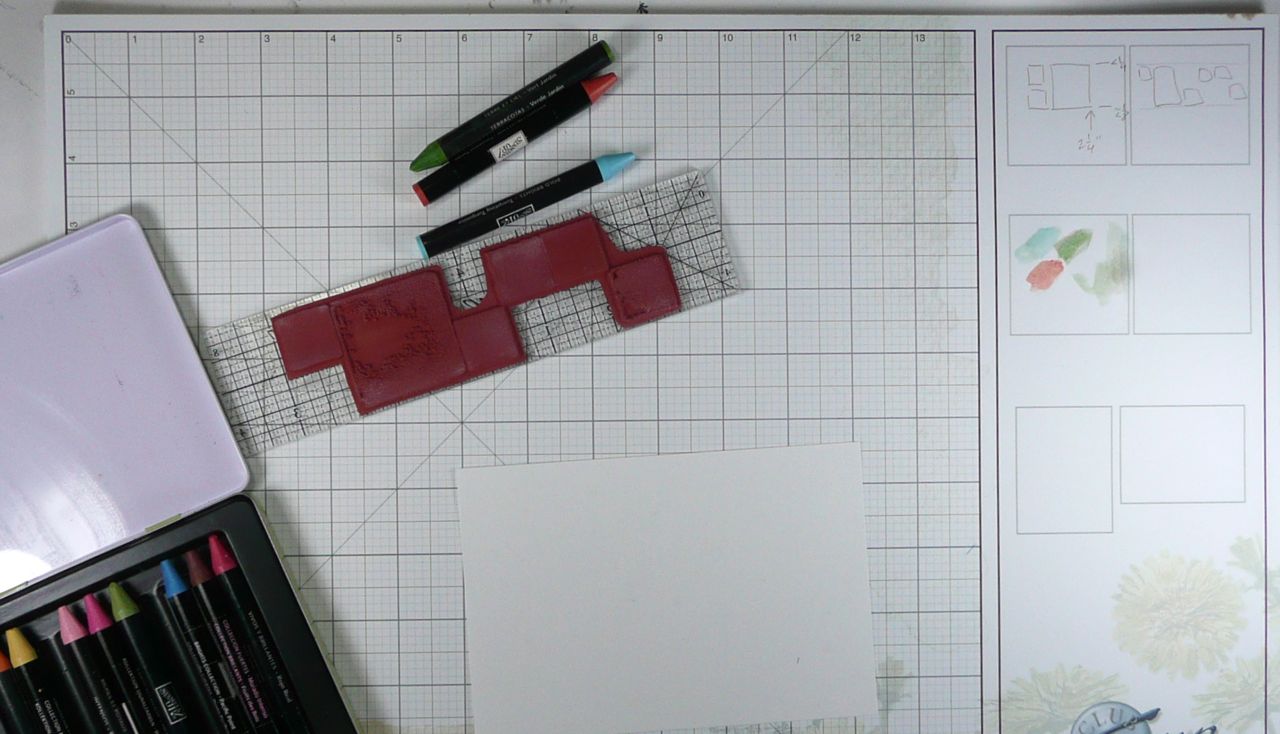
I started by putting my stamps on a gridded acrylic ruler - this is the 2x8 one by Club Scrap. I like their rulers because they are made for papercrafters with 1/8" separation, but gridded rulers can also be found as quilting supplies. The lines will help keep things straight as I go.

Next, I gathered my watercolor crayons (from Stampin' Up!) and made a few notes to myself about the stamp position in the upper right of my scrap paper. You can see that I also try out color combinations on the side.
Next, mist your stamp with water. You need enough so that there are beads of water, but not completely sopping wet.

Color the stamp with a variety of watercolor crayons.

Stamp! From my initial measurements, I knew that lining up the top of paper with the first one inch mark on the ruler would be perfect, and I also lined up the left edge of the ruler with the left edge of the paper. I also taped my panel onto my scratch paper so that it wouldn't move while I was stamping.

Repeat... I flipped the ruler and noted in my test stamping to line up the top edge of the paper with 7/8". I used the lines on the left edge of the ruler to line up with the right edge of the first column of images.

And repeat twice more, flipping the ruler each time.

I like to go off the edge of the paper, but I didn't worry about it too much here, because the paper is larger than the panel I need. When I was looking at the stamps, I noticed that there was one with an outline of several of the squares that fits perfectly over this image. So, I used my ruler to make sure I lined up with the edges of the paper, and eyeballed lining it up on top of the appropriate areas of the stamp:

Here's what it looks like after all of the stamping (that blue is a new color from Club Scrap!):

The white areas bothered me a bit, so I flicked some watercolors on the paper using a brush and my watercolor crayons.

Trim the panel so you use the part you like the best, and make sure you have the image going off the edge on all four sides. I added a sentiment, some ribbon, and a mat and ended up with the card you see at the top of this post.
I had too much fun doing these backgrounds to stop at just one! This one just uses one stamp to create a grid. The lines of the ruler were essential to creating that regular pattern.

This card uses the same outline image, but I switched the colors every other time, and stamped another images in the middle of the large open box. I thought it was cool how that fit inside so cleverly.

This card uses yet another image from the kit (in blue) to just create an all over background. The magenta image was used in the previous card to sort of fill in some areas. The "colorful" sentiment is a single stamp - again using the lines on the ruler to make sure the image was centered in the block each time and nicely separated from its neighbor.

And finally, this card uses a frame stamp in two colors with a second image to fill in some spaces and provide a bit of variety. This background was pretty random, so I didn't use the measurements as much..

These are just a few of the cards I made! Check out the Tilescapes Scrap Rap to see them all. Have questions about a specific card? Let me know, and I'll work up a description for the blog!
Disclaimer: Club Scrap provided all of the stamps and supplies used in these projects. The opinions expressed in this post and designs of the cards are entirely my own!
No comments:
Post a Comment