
- Quick jot journal
- First entry in the Great Lakes Art Showcase
- Notebook folder (second item in this post)
- Thank you book
I also do an elastic closure on some of my wire notebooks, although I don't see an example on my blog right now. This makes the notebooks "purse-safe" and ensures that the pages inside won't be damaged while transporting the books.
To start, I draw a pencil line on the back cover of the book, and punch two holes (I use 3/16 in holes, or the larger standard size for eyelets). I use a crop-a-dile to punch my holes, which allows me to use the punch guide to set a depth for hole. It's also the only tool I know of that can easily punch holes through thick mat board. Using the pencil line I've drawn and the punch guide on the crop-a-dile allows for perfect placement of the holes.

Next, thread the elastic through the hole so that the raw edge is on the inside of the book.

Stretch the elastic, and insert an eyelet so that the raw edge of the eyelet is on the same side as the raw edge of the eyelet. Use the crop-a-dile to set the eyelet.

Wrap the elastic around the book, and trim so that it extends just a bit past back the second hole. Note that you can see the finished side of the first eyelet at the top of this picture.

Unwrap the elastic, and insert the raw edge as shown. Set an eyelet so that the raw edge is on the inside of the back cover. By unwrapping the elastic, you get a lot more play in the elastic which will make this step easer.
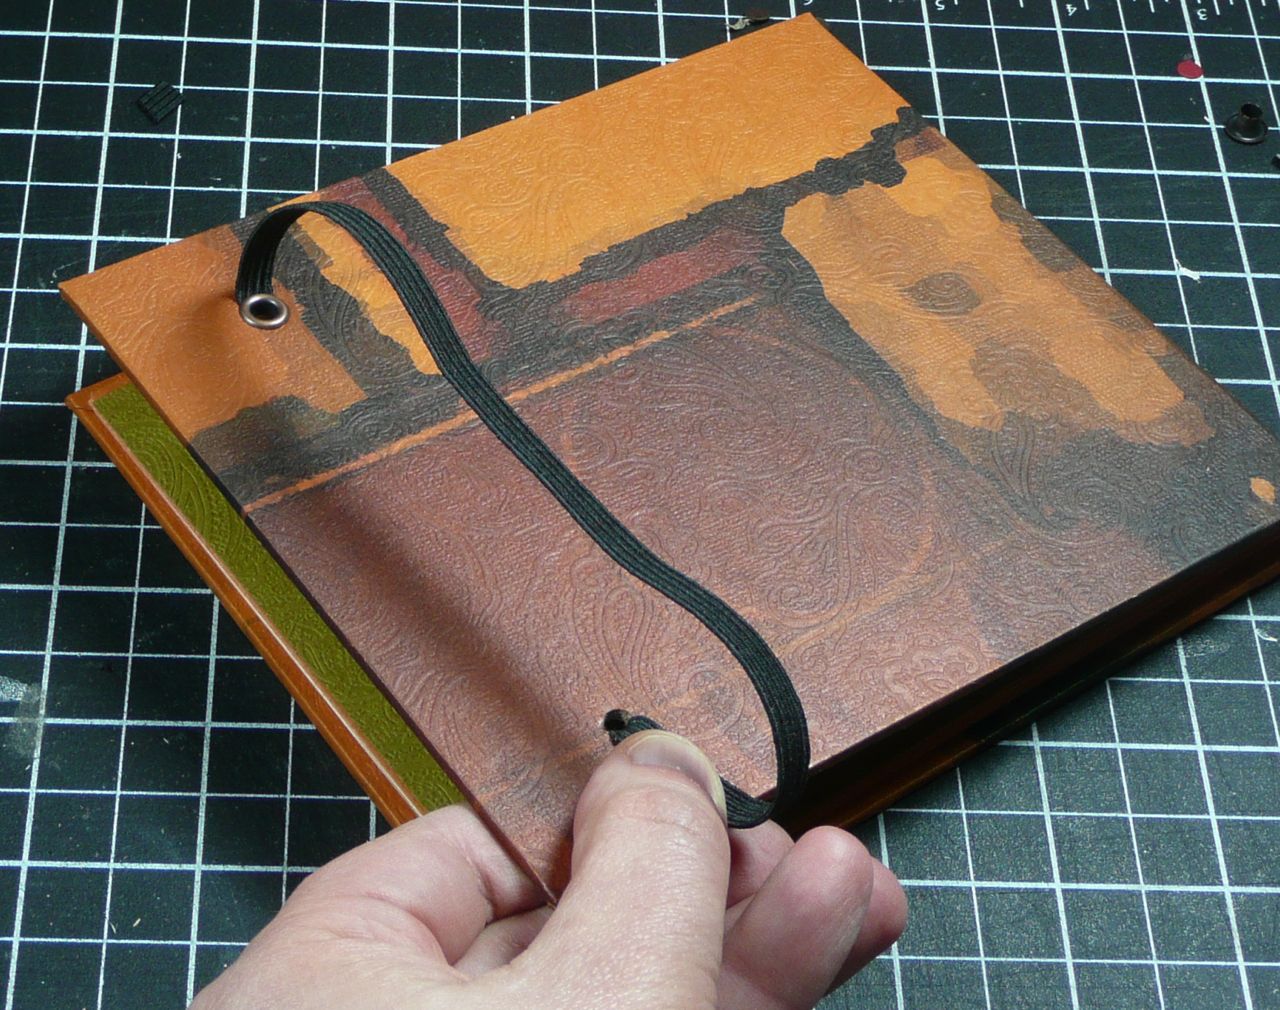
The finished elastic on the inside back cover. Trim the edges of the elastic so that they don't extend past the edges of the book.

The front cover showing the elastic wrapped around the book.

The back cover showing the finished side of the eyelets.

To me, this makes the book more masculine, and a bit cleaner. When I do this for my wire notebooks, my intent is to also make them "purse" friendly so that that pages inside stay neat and tidy. All paper is from Club Scrap.
Check back later in the week to see how I cover the back cover and hide the raw edges of eyelets, elastic, and ribbon!
I always wondered how to do this! So many times my books have an assorted collection of stuff and I always want to have the elastic on it. Thanks for the great tip ;)
ReplyDeleteWow, Deb! I just took a look at the other books you linked to in this post; you have an amazing eye for design. It shouldn’t surprise me. Every time I visit your blog, I’m blown away by…well, your creativity for one thing, but all of your projects just look so cool and sharp. The elastic bands add so much to your books; they really look great.
ReplyDelete