Tuesday, August 03, 2010

Tutorial: Mixed media embellishment

Of course, mixed media means "anything on my desk," right?

Today, I'll show you how I made the tag on this scrapbook layout:

I'm taking a class at Big Picture Scrapbooking with Claudine Hellmuth, and it's causing me to look at my supplies in a new way.  In particular, we're learning a lot of background techniques that can be used as building blocks to create more complex pieces.  I'm using chipboard, a dictionary, gel medium, and a brush to start with.

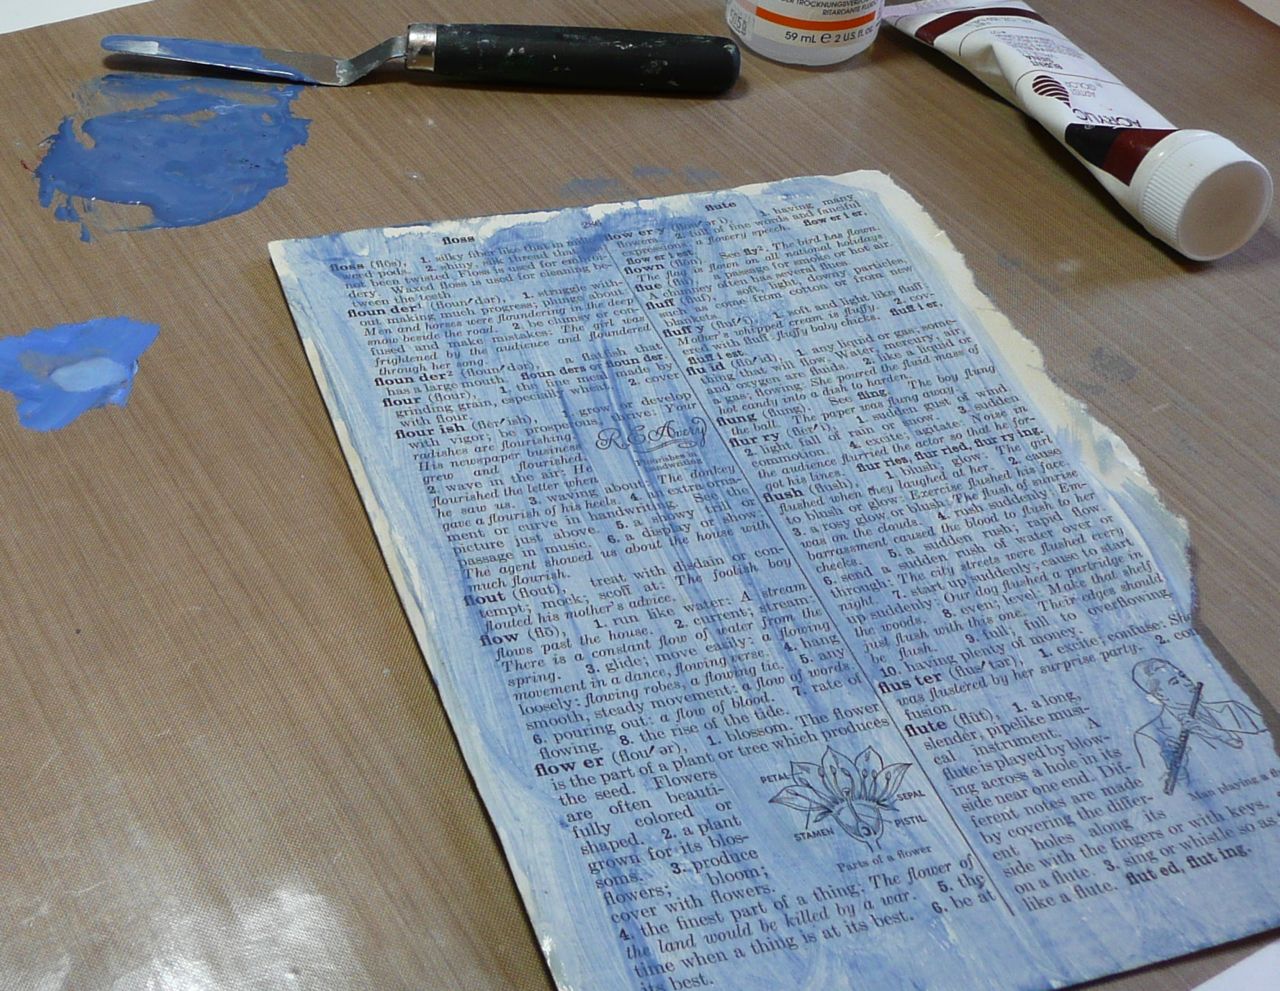
First, I glued a page from a dictionary to a piece of chipboard using fluid gel medium.  I like this dictionary because it has some nice pictures on some of the pages.  The page on the right is a piece of textured grungeboard.  I'm using the piece on the left today.

Next, I mixed paint to create a soft blue.  Blue is one of my favorite colors, so I knew I would be able to use this somewhere.


I then die cut the chipboard into a variety of pieces using my Sizzix Big Shot machine.  If you don't have a die cutting machine, thin chipboard is easy to cut into squares or rectangles that can be used as tags.  I glued an image transfer of some flowers onto the rolodex die cut.


To finish it off, I added a strip of vellum, a bit of ribbon, and some chipboard letters.  I really like how this turned out.

And, as a side note, I will be continuing to blog, but will take a more relaxed pace for the rest of the summer.  I will post a few times in August and early September, but not on any particular schedule.  I hope you enjoy the rest of the lazy days of summer!  (That are turning into not very lazy around here!) I plan on taking at least some time to read some crafty books and gather some new inspiration. Some of the books on my list include some books I love about collage and image transfers.

If you're interested in learning more collage techniques, I really recommend the books by Claudine Hellmuth.  She has a lot of great techniques in her books, as well as examples of projects and composition ideas.  Both books are packed with techniques.  In her first book, the style is more vintage/grunge and in the second, she shows us a lighter style to collage with brighter colors.


If you're just interested in learning about image transfer techniques, like how I made the flowers on my tag, I recommend the book "Image Transfer Workshop." It introduces 35 techniques, and each one is accompanied by a description of its limitations and uses with step-by-step pictures.


Sunday, July 25, 2010

Making Memories Guest Designer

I was recently honored to be asked to design a piece for Making Memories using their new Panorama collection of papers and embellishments.  I was featured on their blog last week.  In case you missed it, here is my take on the project.

First, I created a cover for my project.  I used several pieces of book board, covered with paper.  I just loved the postage stamp border, so I wanted to make this the most prominent part of the cover.  I glued ribbon on the inside to create a nice tie for the cover.  You probably can't tell from the picture, but the airplanes are embossed - very cool effect.

When you open the cover, a coil bound album is on the right, and tags are on the left.  Pockets hold both in place.  I've previously done a tutorial on how to make a coil bound album and pocket.  The pocket on the right is 3/8" wider than the width of the book.  Making the cover is similar to my post bound album tutorial, but with three pieces instead of two.

The tags were from scraps of the paper and some of the trading cards.  I used the index prints from my order, rub-ons, and ribbon to embellish the tags.

I decided to spend most of my embellishing energy on the cover of the book.  To start, I did an image transfer of one of the patterned papers onto chipboard.  I primed the surface with gesso, and while it was still wet, placed the patterned paper on top.  When dry, I wet the paper and rubbed off the paper back.  I used stamps from the collection and two (Remember and Journey) from my Club Scrap stash to recreate a little word collage.  When stamping on the image transferred paper, the ink does naturally bleed a little bit.  Finally, I used more pieces from the kit and index prints to embellish the cover.

The inside pages of the book are chipboard covered with the patterned paper.  I used a lot of the rub ons inside the book.  I love using these on top of photos.  The pictures from Devon and Cornwall last summer were so gorgeous on their own, I didn't feel they needed a lot of extra embellishing.


I really love the collage words on the right hand side.  This is where I got my inspiration for the cover.

I love how this worked out on the right.  The "sign" says "Smell the Roses" with "STOP" in the center.  This is another paper with embossing on it, which doesn't really show in the photograph.

I also found that the Distress Inks by Tim Holtz coordinate really well with these papers.  In particular, I used Weathered Wood, Vintage Photo, Peeled Paint, and Fired Brick.

Having trouble finding some of these items?  I recommend Blockhead Rubber Stamps for the distress inks, and Two Peas in A Bucket for the Making Memories items.

Friday, July 23, 2010

Carpet Tape Techniques - more scrappy cards

After my first set of scrappy cards, I was inspired to try some more geometric shapes.  For some reason, the pieced cards gave me the idea of bricks, so I started making panels for cards, without any particular goals in mind for the greeting or overall design.

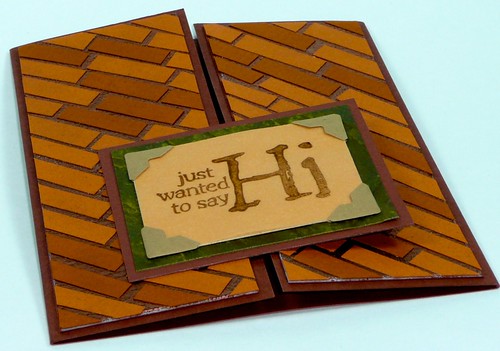
First, I had some card bases already prepared that folded as a gatefold card, so I made skinny panels for these.  Because they were skinny, I think putting the pieces at an angle results in a nicer looking effect, but I like both of these.

Mosaic tiled card - 2

Mosaic tiled card - 4

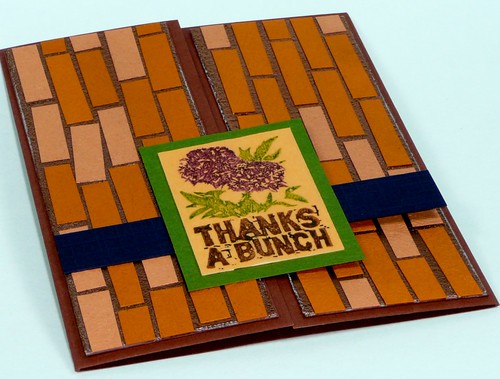
For the larger panels, the tape isn't as wide as the panel, so I try to cover the seam with something before applying the scraps of paper.  I tried putting ribbon on top of the seam from the carpet tape, but I had mixed success with this technique.  On one of my attempts, the embossing powder stuck too much to the ribbon, and made it look messy. The ribbon on this card was cleaner, so I added a sentiment and some flowers on top. The flowers cover up some white area where the embossing powders didn't stick as well as I would have liked. Initially, I didn't like this panel too much, but after adding my sentiment and flowers, it's turned out to be one of my favorites.

Mosaic tiled card - 1

Finally, this sample uses a paper strip after the fact to cover the carpet tape seam. I positioned the strip and sentiment to cover the parts of the technique that didn't turn out as nicely as I wanted. To get the multi-colored stamp image, I used markers to color the individual areas before stamping.

Mosaic tiled card - 3

Paper, stamps, ribbon, and embellishments from Club Scrap.  The paper flowers are from Hero Arts.

Sunday, July 18, 2010

Tutorial - how to mask with paper and stamping

I've been doing a lot of masking on projects, and thought I would do a little tutorial with the most basic masking to start with.  I didn't invent this technique, but I learned it so many years ago, I couldn't tell you the original source!  You can see masking on my Quick Jot Journal, and Photo Twist About projects.  Masking basically covers up either part of an image, or part of a stamp, so you won't stamp over it.

To start, you'll need cardstock to stamp on, stamps of your choice, ink, a piece of scratch paper (not shown) and a foam applicator (I like the handle and oval foam applicators from Clearsnap).  It's also nice to have removable adhesive, and a stippling brush (not shown below).


Tear the piece of scratch paper (the thinner the better) in half.  Use the removable adhesive to adhere the torn paper to your cardstock.

Stamp a variety of images, being sure to stamp some of the images onto the scratch paper.

I like to use a stippling brush to apply a little bit of color to the exposed strip of cardstock.  I like the Color Duster stippling brushes by Judikins.  They fit nicely in your hand and you have a lot of control with them. 


For the last step step, I use a foam applicator to pull darker color (with the same ink pad) onto the edge. I find it works best if you start on the scratch paper and pull onto the cardstock.  Use a light hand and build up the color gradually.  You can pull back (gently!) the scratch paper to check how much color you're adding.  

This is the finished piece.  The torn edge makes it look really difficult, but it's easy!

I just added a ribbon and sentiment, and this card is ready to go.

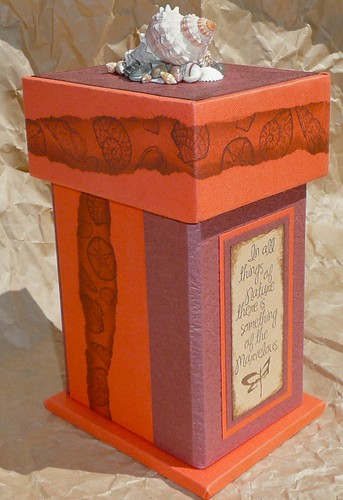
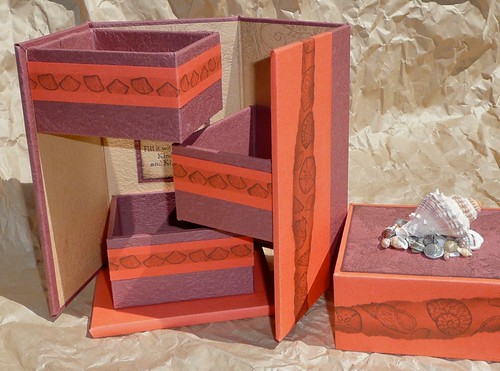
I used the same technique to decorate some paper I used to create this Interlock-a-box project, available from Club Scrap.  To personalize mine, I switched some papers and created the boxes on the inside a different way. I also added quotes on the outside for embellishments.
Interlock-a-box project 3

 On the inside, I created boxes and used the masking technique with a straight edge paper.  This created a "faux" ribbon around the boxes.
Interlock-a-box project 4

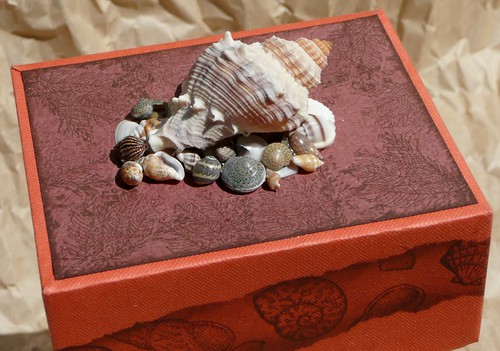
On the top, I glued some small shells using E6000 glue, and then glued a larger shell on top.
Interlock-a-box project 2

My favorite products that I've used in this post (besides the paper from Club Scrap!):

Tuesday, July 13, 2010

Photo Twist-about project

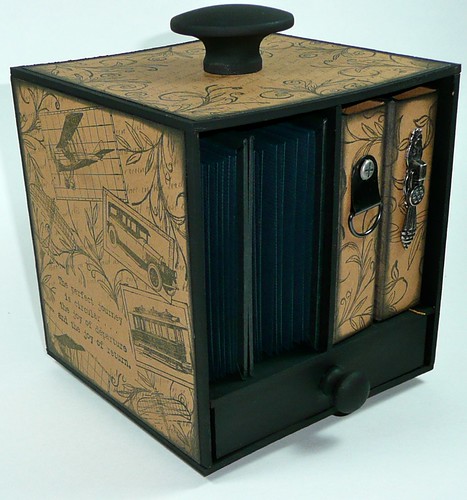
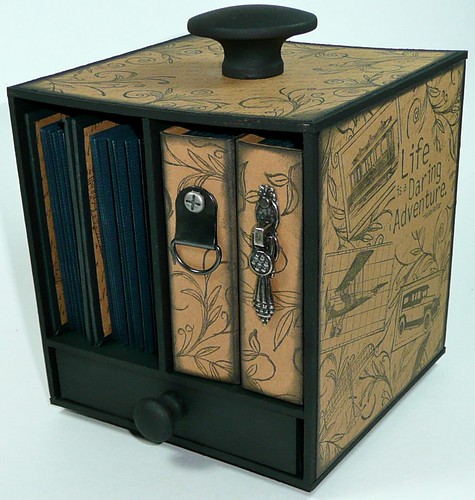
As part of Club Scrap's Weekend of Workshops, I made this lovely Twist-about project.

Twist about - 1

The box is mounted on a lazy-susan type bearing, which allows it to rotate around 360 degrees.

Twist about - 2

On the top, and each side of the album, I have a decorated panel.  I used a central quote surrounded by a variety of stamped images.

There are four little books inside this box.

Twist about - 3

On the inside of each book, I repeated the travel collage idea.  The loose waxed linen thread will later have beads, or ephemera from the album on it.  I haven't decided yet how to finish those details.

Twist about - 4

For some reason, I forgot to take a picture of it, but there is a decorated panel inside the drawer at the bottom, too.  I'm going to use this album to keep some special pictures from our vacations.  We've been to England several times, Mackinaw Island, Bayfield, and Traverse City, and have some really great pictures form each place.  I think this will make a nice decorative item in our living room.

LinkWithin

Related Posts Plugin for WordPress, Blogger...